
C#でボタンのデザインを変更して、無効/有効/マウスオーバーなどの機能を付けたユーザーコントロールの作り方を紹介していきます。
WindowFormアプリでも以外とデザインが変えられるということがわかりました。
目次
スポンサーリンク
リソースファイルの準備
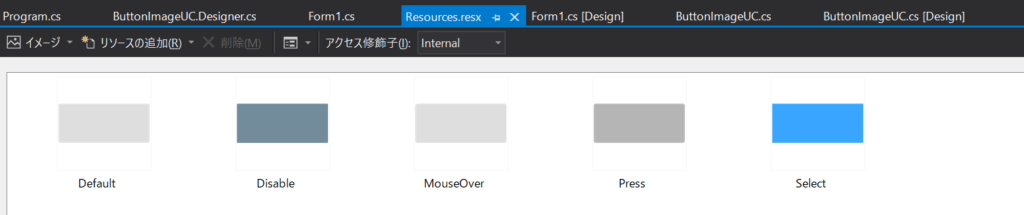
まず、Resources.resxという名前のリソースファイルを用意してボタンの画像データを格納していきます。
ユーザーコントロールの作成
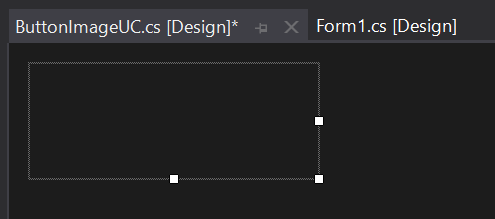
新たにButtonImageUCという名前のユーザーコントロールを追加します。
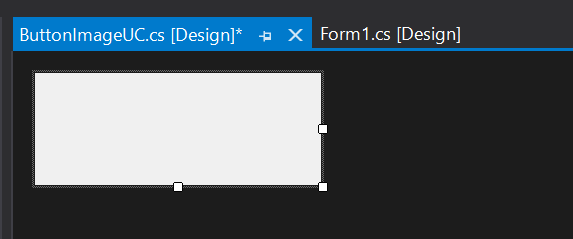
次に、ButtonImageUCのプロパティでBackColorをTransparentに変更。
ButtonImageUC.csの中身を編集していきます。
using System;
using System.ComponentModel;
using System.ComponentModel.Design;
using System.Diagnostics;
using System.Drawing;
using System.Drawing.Design;
using System.Windows.Forms;

namespace WinFormsApp1
{
    public partial class ButtonImageUC : UserControl
    {
		public enum ButtonType
		{
			Button1,
		}

		private ButtonType type = ButtonImageUC.ButtonType.Button1;
		[Browsable(true)]
		public ButtonType Type
		{
			set
			{
				if (this.type == value) return;
				this.type = value;
				CreateBitmap();
			}
			get { return this.type; }
		}

		private bool selected = false;
		[Browsable(true)]
		public bool Selected
		{
			get { return this.selected; }
			set
			{
				if (this.selected == value) return;
				this.selected = value;
				OnSelectedChanged();
			}
		}

		[Bindable(true)]
		[Browsable(true)]
		[Localizable(true)]
		[DesignerSerializationVisibility(DesignerSerializationVisibility.Visible)]
		[EditorBrowsable(EditorBrowsableState.Always)]
		[Editor(typeof(MultilineStringEditor), typeof(UITypeEditor))]
		public override string Text { get; set; }
		public ButtonImageUC()
		{
			InitializeComponent();

			CreateBitmap();
			UpdateBitmap(); // デザイナでEnabledがfalseにされていた場合ここで更新。
		}

		private enum BitmapType
		{
			Default,
			Highlighted,
			Pressed,
			Selected,
			Disabled,
		}
		private BitmapType bitmapType = BitmapType.Default;

		private Bitmap[] bitmap;
		private Brush[] foreColor;

		private void CreateBitmap()
		{
			switch (this.Type)
			{
				case ButtonType.Button1:
					CreateGrayBitmap();
					break;
				default:
					Debug.Assert(false);
					CreateGrayBitmap();
					break;
			}
		}

		internal static readonly Color ForeColorDefault = Color.FromArgb(0x00, 0x00, 0x00);
		internal static readonly Color ForeColorHighlighted = Color.FromArgb(0x26, 0x26, 0x26);
		internal static readonly Color ForeColorPressed = Color.FromArgb(0x00, 0x00, 0x00);
		internal static readonly Color ForeColorSelected = Color.FromArgb(0xFF, 0xFF, 0xFF);
		internal static readonly Color ForeColorDisabled = Color.FromArgb(0xB2, 0xB2, 0xB2);

		private void CreateGrayBitmap()
		{
			DisposeBitmap();
			Debug.Assert(this.bitmap == null);
			this.bitmap = new Bitmap[Enum.GetValues(typeof(BitmapType)).Length];
			this.bitmap[(int)BitmapType.Default] = Resources.Default;
			this.bitmap[(int)BitmapType.Highlighted] = Resources.MouseOver;
			this.bitmap[(int)BitmapType.Pressed] = Resources.Press;
			this.bitmap[(int)BitmapType.Selected] = Resources.Select;
			this.bitmap[(int)BitmapType.Disabled] = Resources.Disable;

            this.foreColor = new Brush[Enum.GetValues(typeof(BitmapType)).Length];
            this.foreColor[(int)BitmapType.Default] = new SolidBrush(ButtonImageUC.ForeColorDefault);
            this.foreColor[(int)BitmapType.Highlighted] = new SolidBrush(ButtonImageUC.ForeColorHighlighted);
            this.foreColor[(int)BitmapType.Pressed] = new SolidBrush(ButtonImageUC.ForeColorPressed);
            this.foreColor[(int)BitmapType.Selected] = new SolidBrush(ButtonImageUC.ForeColorSelected);
            this.foreColor[(int)BitmapType.Disabled] = new SolidBrush(ButtonImageUC.ForeColorDisabled); // 現状の実装では反映されない。
        }

		private void DisposeBitmap()
		{
			if (this.bitmap != null) foreach (var target in this.bitmap) { target?.Dispose(); };
			this.bitmap = null;

			if (this.foreColor != null) foreach (var target in this.foreColor) { target?.Dispose(); }
			this.foreColor = null;
		}

		protected override void OnEnabledChanged(EventArgs e)
		{
			base.OnEnabledChanged(e);
			UpdateBitmap();
		}

		private void OnSelectedChanged()
		{
			UpdateBitmap();
		}

		private void button_Click(object sender, EventArgs e)
		{
			this.OnClick(e);
		}

		private bool highlited = false;
		private void button_MouseEnter(object sender, EventArgs e)
		{
			this.highlited = true;
			UpdateBitmap();
		}

		private void button_MouseLeave(object sender, EventArgs e)
		{
			this.highlited = false;
			UpdateBitmap();
		}

		private bool pressed = false;
		private void button_MouseDown(object sender, MouseEventArgs e)
		{
			this.pressed = true;
			UpdateBitmap();
		}

		private void button_MouseUp(object sender, MouseEventArgs e)
		{
			this.pressed = false;
			UpdateBitmap();
		}

		private void button_MouseCaptureChanged(object sender, EventArgs e)
		{
			this.pressed = false;
			UpdateBitmap();
		}

		private bool UpdateBitmap()
		{
			BitmapType current = GetCurrentBitmapType();
			if (this.bitmapType == current) return false;
			this.bitmapType = current;
			Invalidate();
			return true;
		}

		private BitmapType GetCurrentBitmapType()
		{
			if (this.selected) return BitmapType.Selected;
			if (!this.Enabled) return BitmapType.Disabled;
			if (this.pressed) return BitmapType.Pressed;
			if (this.highlited) return BitmapType.Highlighted;
			return BitmapType.Default;
		}

		private readonly StringFormat stringFormat = new StringFormat()
		{
			LineAlignment = StringAlignment.Center,
			Alignment = StringAlignment.Center,
			Trimming = StringTrimming.None,
		};

		private void ButtonImageUC_Paint(object sender, PaintEventArgs e)
		{
			if (!this.Visible) return;
			e.Graphics.DrawImage(this.bitmap[(int)this.bitmapType], this.ClientRectangle);
			e.Graphics.DrawString(this.Text, this.Font, this.foreColor[(int)this.bitmapType], this.ClientRectangle, this.stringFormat);
		}
	}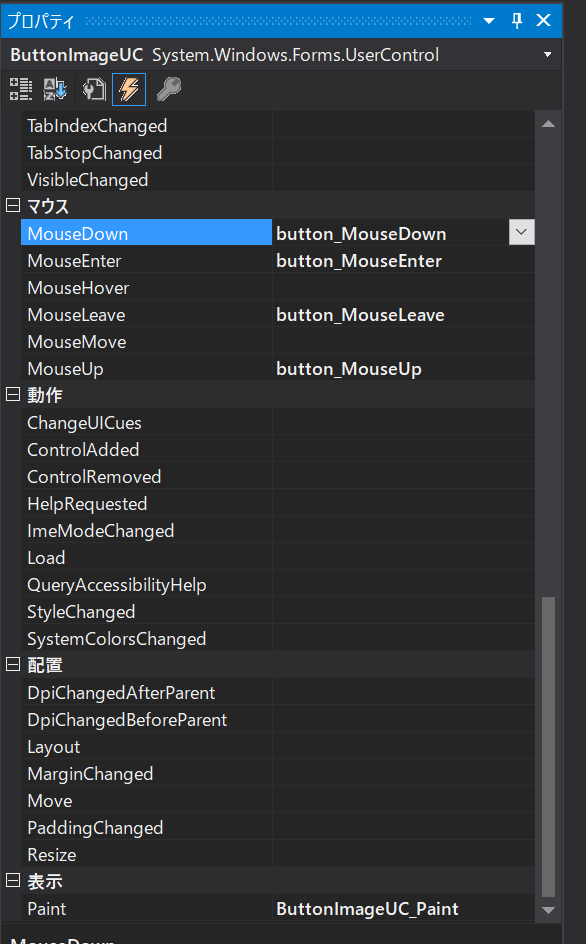
}button_MouseDown、button_MouseEnter、button_MouseLeave、button_MouseUpのイベントは必ず紐付けておきます。
ボタンの種類を増やしたい場合は?
ボタンの種類を増やしたい場合は、列挙体のButtonBypeを増やしていきます。
public enum ButtonType
{
	Button1,
 Button2,
 Button3,
}次に、CreateBitmap()関数のswitch文で好みのボタンを作成していくだけ。
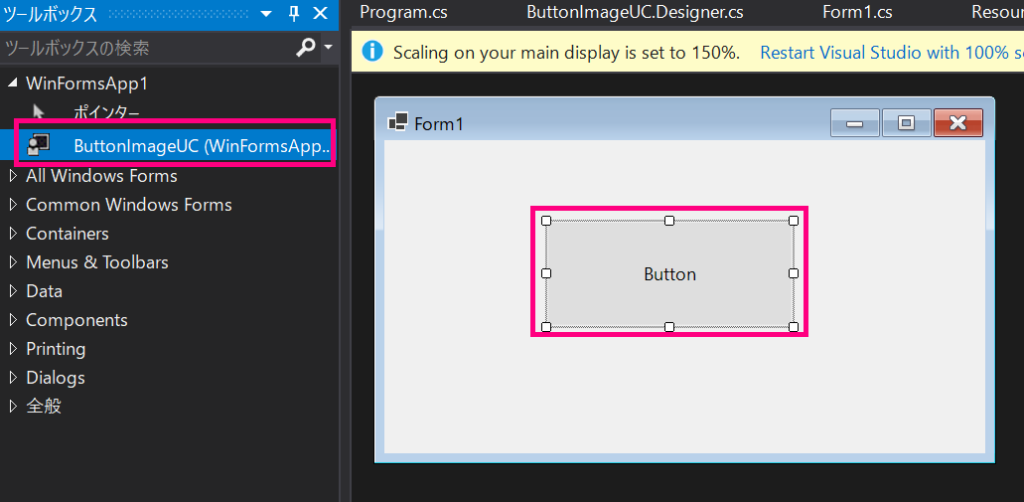
ユーザーコントロールの配置
ビルドするとユーザーコントロールがツールボックスに生成されるので、通常のコントロールと同様にFormにユーザーコントロールを配置していきます。
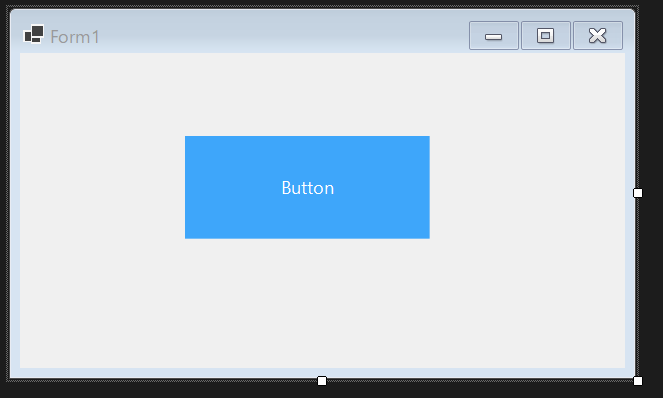
ボタンの種類を変更したい場合は、プロパティのTypeから選択することで変更できます。

SeletetedをTrueにすると、背景が青いボタンに変身。


コメント
コメント一覧 (2件)
たいへん役立ちました。記事を書いてくださりありがとうございます。
ただ、一点。
「ツールボックスアイテム’ButtonImageUC’の読み込みに失敗しました。アイテムはツールボックスから削除されます。」
といったエラーが出て、フォームデザイナーに貼り付けることができませんでした。調べたところ、一度ソリューションのビルドが必要との情報がありました。
https://buralog.jp/windows-form-usercontrol-error/
これで問題なく、貼り付けられるようになりました。
回答が遅くなり申し訳ございません。コメントの通りユーザーコントロールを反映するためには一度ビルドする必要がありました。